It started out at -1 degree Fahrenheit this morning, so what better to do today than keep warm working on my coat! First I constructed the pockets. This particular pocket is cut on the bias, so that you don't have to match the plaid, but the flap part is cut on the straight grain, so that you do need to match. I hadn't thought about that when cutting, but with an amazing bit of luck, my flaps lined up just perfectly. I pinned the pockets in place and tried on the coat. The placement was too high for my comfort, so I lowered them 3 inches so that my hand could go in easily. I also opted to not put a buttonhole in the flap. I couldn't see trying to unbutton my pocket everytime I wanted to put something in them.

Next was the back tab. The back tab is also cut on the bias and gets inserted in the seams between the back, and the side back. I originally placed them where it was marked, but the placement was way too high for me. I had to lower it by 2 inchees to get it to hit my waist. This pattern also has sleeve tabs which are pretty much the same as the back tab, so I won't go into them here.
The last feature is the collar. This pattern was nice in that it had both a under collar pattern and an upper collar pattern. They are slightly different shapes so that the collar will lay better. However, they were both cut on the straight grain, and in one piece. From my experience, an undercollar cut in two pieces on the bias will lay much, much nicer. So, I added a center back seam and layed it on the bias for cutting. The picture shows you the undercollar already sewn to the upper collar, trimmed and ready for turning.
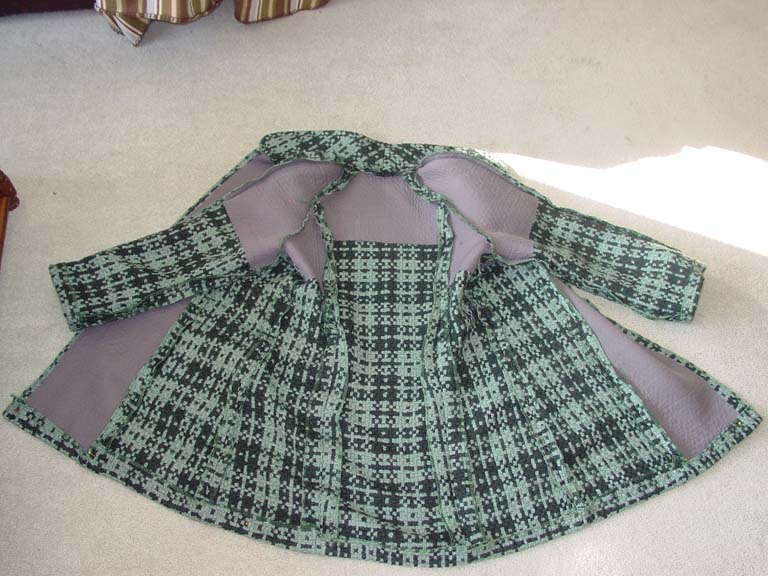
Next, the collar is sewn on, the hem is pressed up and handstitched 1/2" from the edge. The hem at the facing is just pressed up, not sewn in place, as this will get stitched when the lining is added. So, this is what the inside of the coat looks like. Not a pretty site, but we're not far from finished at this point!

Now, it's time to cut and sew the lining. I cut all of the lining pieces 1 inch shorter than the outer fabric pieces. I use the "bagging" technique, and ignore the pattern instructions at this point. To "bag a lining", you basically are using your sewing machine to attach the lining, rather than tedious handsewing. The front facings are sewn to the side fronts, but are left open for the bottom 3 inches. Then a hole is left in one of the side seams- at least 6 inches- so that you can turn the lining inside out. Search for "bagging a lining" for all of the specific details on this method, as there are some good tutorials online, and the sleeve hems are particularly tricky.
Once your lining is complete, you can sew the outershell to the lining, reach in through the hole, and turn it all inside out. This is my favorite part. All of the loose threads, and interfacing are now completely hidden. All that needs to be done at this point is a little handstitching, buttons, and pressing.


 Now, it's time to cut and sew the lining. I cut all of the lining pieces 1 inch shorter than the outer fabric pieces. I use the "bagging" technique, and ignore the pattern instructions at this point. To "bag a lining", you basically are using your sewing machine to attach the lining, rather than tedious handsewing. The front facings are sewn to the side fronts, but are left open for the bottom 3 inches. Then a hole is left in one of the side seams- at least 6 inches- so that you can turn the lining inside out. Search for "bagging a lining" for all of the specific details on this method, as there are some good tutorials online, and the sleeve hems are particularly tricky.
Comments
Post a Comment
Thanks for visiting my blog! I would love to hear your opinions! Please share your comments here.