Have you ever wondered where the word "notion" came from? I looked it up, and found this:
Notion- Word Origin and History for notion n. "miscellaneous articles," 1805, American English, from notion with the idea of "clever invention."
This finally makes sense to me! Zippers, buttons, elastic- all fit the description of a clever invention! Alas, all of these clever inventions can often add up to cost more than the fabric for a project, so that's why I usually choose notion-lite projects. I bristle at the price of zippers these days- grrrr.
 But this particular jacket, the Wear Everyday Coat from the Spring/Summer Ottobre Woman issue, caught my eye, because of the notions. The plain white coat, accented with bright yellow cord locks and contrasting zippers was something that I wanted to copy. I had a really nice white synthetic knit with a fleece back in my stash-
just enough for this jacket, with barely a scrap to spare. I made a size 42 in the neck/shoulder, and 44 in the body, and I'm happy with the fit.
But this particular jacket, the Wear Everyday Coat from the Spring/Summer Ottobre Woman issue, caught my eye, because of the notions. The plain white coat, accented with bright yellow cord locks and contrasting zippers was something that I wanted to copy. I had a really nice white synthetic knit with a fleece back in my stash-
just enough for this jacket, with barely a scrap to spare. I made a size 42 in the neck/shoulder, and 44 in the body, and I'm happy with the fit.


I cut it out first, then went to look for the notions to go with it. Here's a pic of all of the notions that I got for the project:

The cord locks were the hardest to find. I really wanted a bright lime green, and the only place that I could find them in small quantities was on Ebay from this vendor. They took about a month to get here, but I think it was worth the wait. A word of advice- if you order some notions from China, put everything else in one place while you wait. By the time they arrived, I had completely forgotten where I put everything else, and wasted a couple of hours tracking it all down! I had bagged up the cut out pieces, but my husband had thought it was a bag of leftover scraps, and used one piece to clean up some oil. Yikes!!!! Luckily it washed out. Whew!
Since Ottobre doesn't have illustrated instructions, I took photos along the way of some of the more unusual steps, so that if mine turned out okay, I could pass this process info along to you- just a little supplement to their written instructions. A warning, my sewing is imperfect at best, so if you are a perfectionist, and get caught up in my crooked seams, then just squint. It all looks fine when you squint.:)
First, interface the edges of the pocket opening. Then, place the zipper next to it to determine how much it needs to be shortened. Stitch back and forth over the teeth at the new zipper stop, and cut off the rest of the zipper, leaving about 1/2" below the new zipper stop.
 Next, sew the center fronts to the side fronts, leaving the pocket openings unsewn. I pressed the seam allowances back, although my synthetic fabric didn't want to hold a crease, so it's hard to see here. Apply Wonder tape to the right side of the zipper, and then press to the seam allowances.
 Using a zipper foot, stitch the seam allowances to the zipper, trying to show as much of the zipper teeth as possible for that pop of color.

Apply Wonder tape to the wrong side of the zipper tape, and press the pocket bags to each side of the zipper, folding the pocket bag back and stitching from the top of the zipper to the bottom.
 Place the pocket bags wrong sides together, and stitch around the open edges. I serged mine.

Lastly, thread a short piece of elastic cord through the zipper pull and cord locks, tie a knot and cut off the excess. Pockets- done!
 Next up was the hood. This is where you need the eyelets.
 I used 4 mm white eyelets, applied with the Dritz pliers. I made and attached the hood facing, and trimmed the facing with the single fold bias tape. The pattern instructions actually have you make the bias yourself from fabric. However, if you just want a solid color like I did, then a 4 yard package will do all of the binding in the garment without a little left over.
 Next, thread the elastic cord through the facing and cord locks, and then stitch the ends down at the front casing. This is what it looks like at this point.

Then the last step of the hood is to attach it to the jacket body, and cover the neck seam with the bias. Hood- done!
 Then on to the big zipper. First, interface the front edges with a 1" strip of fusible interfacing. This is really a critical step. If you don't do this, you'll end up with a wavy zipper. (My zipper is a 24" Ghee's separating zipper, that has black teeth on one side, and white teeth on the other. Isn't it cool? It's a little short- a 27" zipper would have been perfect, but I placed the top of the zipper a couple of inches lower to account for the shortness.)
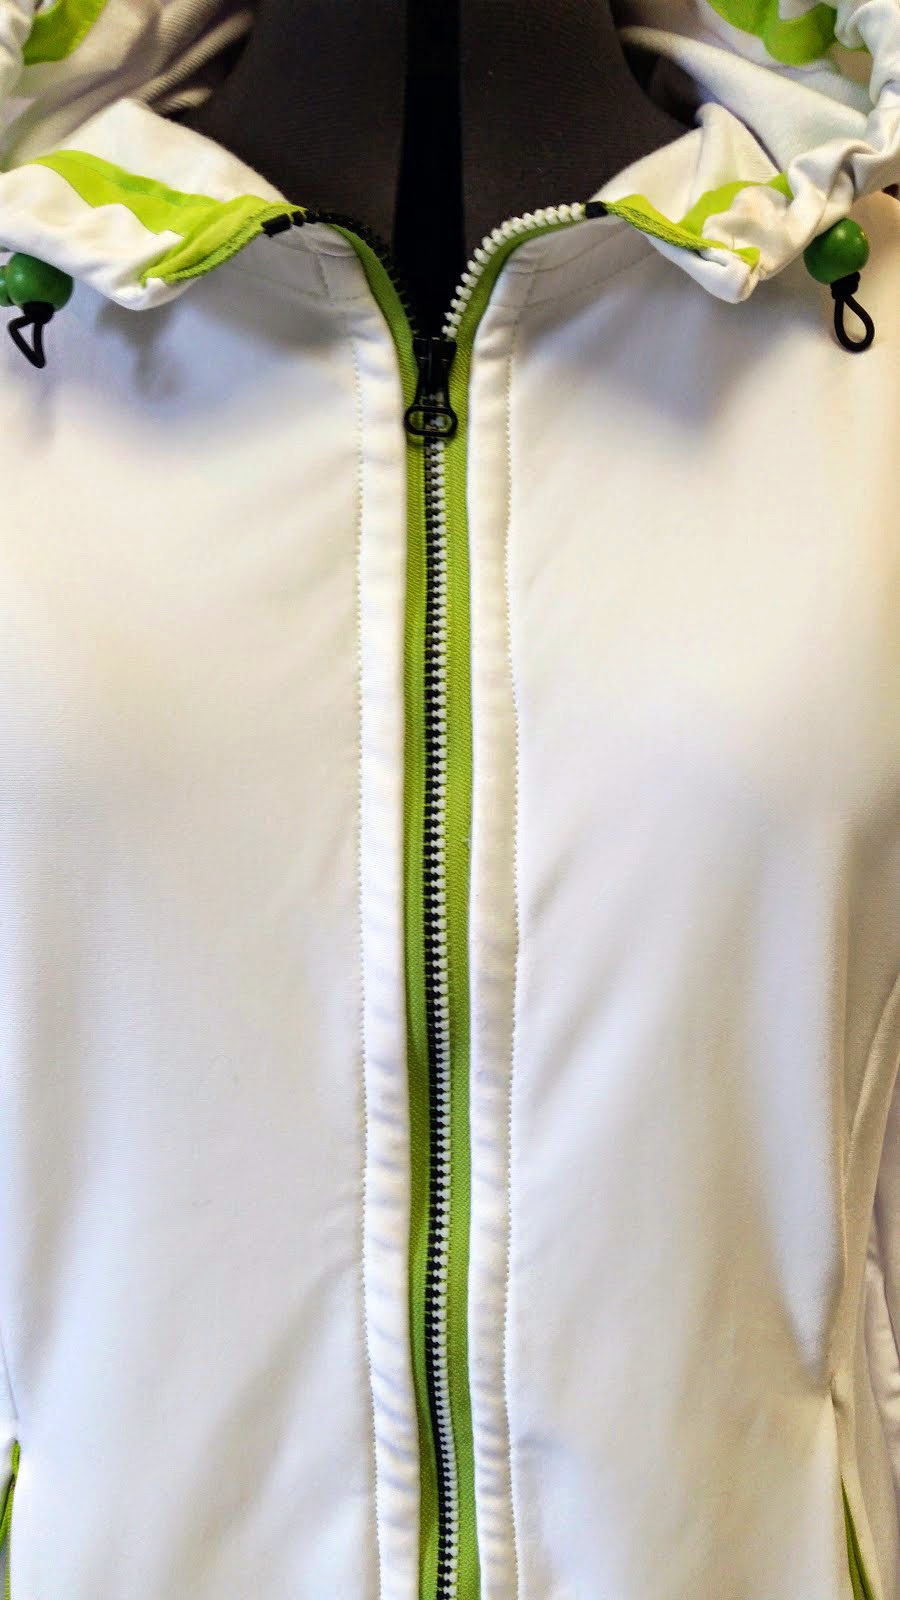
Insert the zipper to the front edges with the teeth exposed, and stitched in place. The last step is to bind the edge of the zipper and seam allowance together with the binding fabric, and then stitch down. Zipper- done!
Here is what this looks like from the outside:
 And turning the jacket wrong side out, here is what it looks like from the inside:

The last step is to hem the bottom edge and the sleeves. For this I used a twin needle with lime green thread. Just one little last touch of lime to tie it all together. Hems- done! I hope these visuals will help if you decide to make this jacket. I'm up to 10 items sewn from this Ottobre Woman issue! This is a record for me- I'm having so much fun with it.

Do you avoid patterns with lots of notions? Or do you seek them out so that you can use cool inventions?
Happy Sewing!
Ann
Notion- Word Origin and History for notion n. "miscellaneous articles," 1805, American English, from notion with the idea of "clever invention."
I cut it out first, then went to look for the notions to go with it. Here's a pic of all of the notions that I got for the project:
The cord locks were the hardest to find. I really wanted a bright lime green, and the only place that I could find them in small quantities was on Ebay from this vendor. They took about a month to get here, but I think it was worth the wait. A word of advice- if you order some notions from China, put everything else in one place while you wait. By the time they arrived, I had completely forgotten where I put everything else, and wasted a couple of hours tracking it all down! I had bagged up the cut out pieces, but my husband had thought it was a bag of leftover scraps, and used one piece to clean up some oil. Yikes!!!! Luckily it washed out. Whew!
Since Ottobre doesn't have illustrated instructions, I took photos along the way of some of the more unusual steps, so that if mine turned out okay, I could pass this process info along to you- just a little supplement to their written instructions. A warning, my sewing is imperfect at best, so if you are a perfectionist, and get caught up in my crooked seams, then just squint. It all looks fine when you squint.:)
First, interface the edges of the pocket opening. Then, place the zipper next to it to determine how much it needs to be shortened. Stitch back and forth over the teeth at the new zipper stop, and cut off the rest of the zipper, leaving about 1/2" below the new zipper stop.
Apply Wonder tape to the wrong side of the zipper tape, and press the pocket bags to each side of the zipper, folding the pocket bag back and stitching from the top of the zipper to the bottom.
Lastly, thread a short piece of elastic cord through the zipper pull and cord locks, tie a knot and cut off the excess. Pockets- done!
Then the last step of the hood is to attach it to the jacket body, and cover the neck seam with the bias. Hood- done!
Insert the zipper to the front edges with the teeth exposed, and stitched in place. The last step is to bind the edge of the zipper and seam allowance together with the binding fabric, and then stitch down. Zipper- done!
Here is what this looks like from the outside:
Do you avoid patterns with lots of notions? Or do you seek them out so that you can use cool inventions?
Happy Sewing!
Ann
WOW!!! This is so fantastic! I love all the accents and wish I wasn't afraid of half that stuff! lol! I was "brave" and bought eyelets but still haven't used them. And zippered pockets? Oy!
ReplyDeleteI'm flabbergasted at the husband! He's so lucky the oil came out! :-p
Thanks, Nakisha! The eyelets weren't too bad. I think you'd find they are not so scary once you try them out!
DeleteOh Ann, I LOVE your coat! Where did you get the fabric? I love projects with lots of notions just because it makes them so
ReplyDeleteRTW and people can't believe you actually made it!
Sue--I love this jacket and made one too, I might have to make a white one like yours! Such a great pattern and I love Ottobre!
BTW, I am going to check out the vendor for the cord locks!
Thanks, Sue. I liked your purple one too! I got this fabric at Fabric.com years ago. It's possible that this fabric that they have now is similar:https://www.fabric.com/buy/0387380/stretch-micro-french-terry-knit-white
DeleteBut, I'm pretty sure that mine doesn't have any cotton.
LOVE IT! I really really like it in white. Great work, it looks so good on you.
ReplyDeleteThank you, Kathy!
DeleteVery nice!! Worth the cost in 'notions'.
ReplyDeleteThanks, Vicki!
DeleteWonderful! This issue is really something, isn't it? I have a question for you about the sculpture blouse -- is there somewhere I could email you? There is a pair of marks on the right front shoulder, on either side (neck and armhole) and I just don't know what they mean. Thanks for posting your projects -- I find them very inspiring.
ReplyDeleteThanks, Rose! I'll take a look at that pattern and see if I can help you. You can e-mail me directly at sewbaby@sewbaby.com
DeleteGreat jacket! The white and green look so fresh together.
ReplyDeleteThank you, Jean Margaret!
DeleteLovely new coat! The pop of lime is really fun!
ReplyDeleteThanks, Melissa!
ReplyDelete